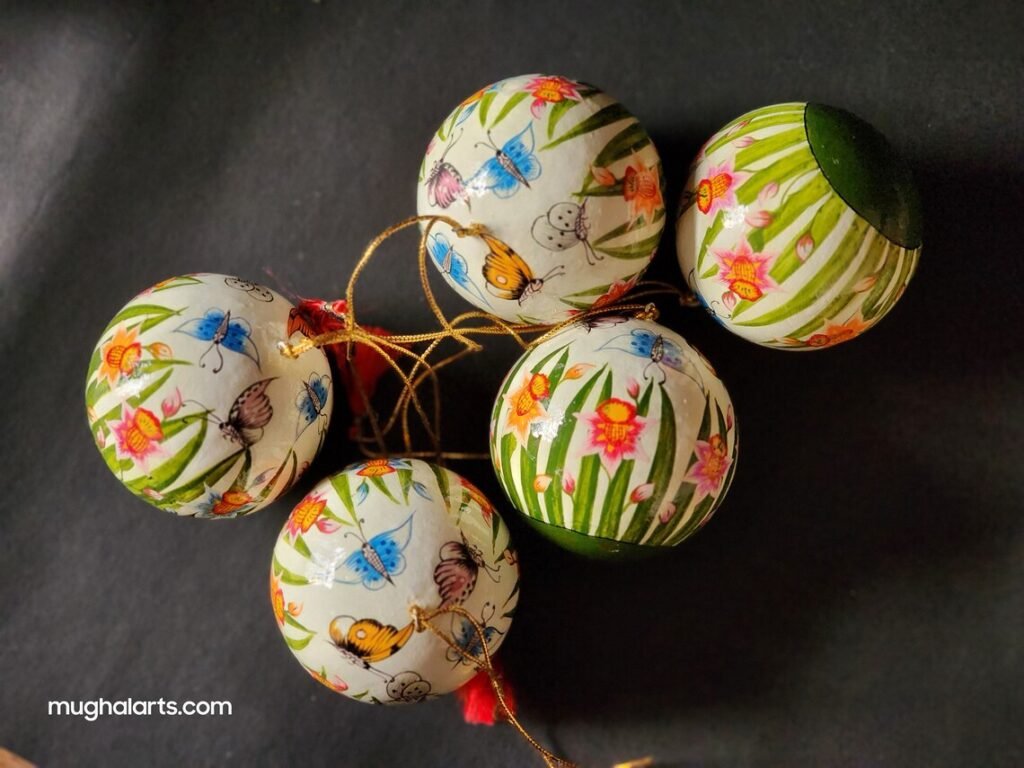
The papier mache process is where discarded paper begins a remarkable transformation into decorative art, handcrafted home accents, festive ornaments, and timeless keepsakes. At Mughal Arts, this journey is deeply connected to the heritage of Kashmiri craftsmanship, where patience, recycled materials, and artistic skill come together to create objects of beauty and cultural value.
If you have ever admired a finely painted papier-mâché box, Christmas bauble, coaster set, tray, or ornament, the finished piece may look delicate and effortless. In reality, every item begins with a disciplined base-making process that involves sorting waste paper, soaking it, forming pulp, preparing shapes, drying, and refining the surface before decoration can even start. These first steps are the foundation of quality, durability, and detail.
In this guide, we walk through the early stages of papier mache production, explain why each step matters, and show how this traditional craft continues to remain relevant in a world that values handmade design, sustainability, and cultural artistry.

Understanding Papier Mache as a Craft
Papier mache, also written as papier-mâché or paper mache, is a craft technique in which paper is softened, layered, or pulped and then shaped into decorative or functional forms. Although many people know it as a school craft, in Kashmir it has a much deeper artistic identity. Traditional Kashmiri papier mache is associated with decorative surfaces, hand painting, lacquer work, ornamental design, and refined finishing that elevate paper into collectible art.
The first stages of the papier mache process are often overlooked because they happen before color, pattern, and shine appear. However, artisans know that the beauty of the final object depends heavily on the quality of the base. If the pulp is weak, uneven, or poorly dried, the final artwork will not hold its shape well and may develop cracks, roughness, or structural weakness over time.
Why the First Steps Matter
The initial steps in papier mache are not simply mechanical preparation. They determine how smooth the surface becomes, how easily the object can be carved or refined, how long it will last, and how well decorative paint and lacquer will adhere later. A well-prepared base gives artisans confidence to create intricate motifs, floral patterns, birds, geometric borders, and traditional Kashmiri themes.
These steps also reveal the sustainable nature of the craft. Materials that might otherwise be thrown away are transformed into objects with artistic, decorative, and sometimes practical use. This makes papier mache one of the most creative examples of reuse in traditional handicrafts.
The Core Materials Used at the Beginning
The papier mache process begins with humble materials. Depending on the artisan’s method and the type of object being produced, these may include:
- Waste paper collected from usable discarded sources.
- Old newspapers and printed paper.
- Cardboard, packing paper, and used paperboard.
- Paper pulp from recycled paper processing.
- Water for soaking and softening the fibers.
- Natural or prepared binding agents such as adhesive, flour paste, or starch-based mixtures.
- Moulds, hand tools, and shaping forms used to create the base structure.
Step 1: Gathering and Sorting Paper
The first practical step is collecting paper suitable for pulp making or layering. Not every type of paper behaves in the same way. Some break down quickly and create a softer pulp, while others add strength and density. Artisans often sort paper according to thickness, texture, and cleanliness before beginning the soaking process.
Clean waste paper is preferred because it reduces contamination and helps produce a more even material. Thick board can be useful for structure, while softer paper helps create workable pulp. The balance between softness and strength is important, especially when the finished product must be durable and smooth enough for decorative finishing.
Step 2: Tearing or Shredding the Paper
Once the paper is selected, it is torn or shredded into small pieces. This increases the surface area and makes it easier for water to penetrate the fibers. Smaller pieces soften more evenly and help create a consistent pulp, which is essential when artisans want a uniform structure throughout the object.
Shredding is also important for workflow. Large pieces of paper take longer to soak and may leave lumps that affect shaping. A finer breakdown makes mixing smoother and reduces the risk of weak points in the base.

Step 3: Soaking the Paper
After shredding, the paper is soaked in water. This is one of the most important stages in the entire papier mache process because it softens the fibers and prepares them to bond into pulp. Depending on the thickness of the paper and the technique being used, soaking may take several hours or much longer.
The goal is to relax the material so it can be mashed, blended, or pressed into a workable state. Proper soaking makes the pulp easier to handle and contributes to a smoother base. If the paper is not soaked enough, the material remains coarse and difficult to shape.
Step 4: Making the Pulp
Once softened, the soaked paper is worked into pulp. This can be done by hand, by pounding, or with mechanical assistance depending on the production scale and the artisan’s preferred method. The objective is to create a fibrous mass that is workable, cohesive, and suitable for shaping.
During this stage, excess water may be managed and a binding material may be introduced to improve hold and strength. The artisan must find the right consistency. If the pulp is too watery, it will not shape properly. If it is too dry or coarse, it may crack or resist detailed forming.
A well-prepared pulp is one of the invisible strengths of a finished piece. It supports a smoother decorative surface and gives the artisan more control over shape, balance, and durability.
Traditional Knowledge Behind the Process
Skilled artisans learn how different papers behave, how long they should soak, how much binder adds strength, and how climate affects drying. This practical understanding is often passed through generations and helps preserve the authenticity of handmade Kashmiri papier mache.
That depth of knowledge is one reason handcrafted work remains so valued among collectors, home decor buyers, and those who appreciate traditional techniques shaped by experience rather than mass production.
Step 5: Shaping and Moulding
After the pulp is ready, it is shaped into the desired form. This can involve pressing the pulp into moulds, layering it over a structure, or hand-forming shapes directly. The method depends on the intended product. Decorative eggs, boxes, trays, ornaments, bowls, and festive baubles may each require a different approach.
Moulding is where the object first begins to resemble its final form. Even at this stage, artisans must think ahead. They consider thickness, balance, symmetry, and how the object will behave during drying. Too much material in one area can create distortion, while an uneven surface may require more finishing later.
Step 6: Drying the Form Carefully
Drying is not merely a waiting period. It is a structural stage in which the wet form gradually hardens and stabilizes. The object must dry thoroughly so it keeps its intended shape and does not retain moisture that could weaken the structure later.
Drying time depends on size, thickness, weather conditions, and the complexity of the form. Small pieces may dry relatively quickly, while larger or denser pieces require far more time. Rushing this stage can lead to warping, surface irregularities, and internal weakness.
Step 7: Refining the Surface
Once dry, the object is inspected and refined. Rough edges are corrected, uneven sections are smoothed, and the surface is prepared for later decorative work. This step may involve scraping, sanding, trimming, or reinforcing small areas that need improvement.
Surface refinement is vital because Kashmiri papier mache is known for its decorative excellence. Floral painting, gilded detailing, intricate borders, and lacquered finishes all depend on a well-prepared base.

How the Base Affects the Final Artwork
A beautifully painted papier mache object depends on what happens long before the final floral motifs, lacquer layers, or decorative outlines are applied. The smoother and more balanced the base, the easier it becomes to achieve refined hand painting and elegant finishing.
This is especially important for decorative products such as jewelry boxes, hand-painted trays, ornaments, and keepsake pieces that are appreciated for both design and craftsmanship.
Why This Craft Still Matters Today
One of the most inspiring aspects of the papier mache process is its connection to reuse and sustainability. Materials that might otherwise be treated as waste are repurposed into objects with artistic and decorative value. This makes the craft relevant not only as cultural heritage, but also as a thoughtful design practice for modern times.
Kashmir has long been associated with fine craftsmanship, and papier mache remains one of its most admired artistic traditions. The craft is celebrated for combining material simplicity with refined decorative sophistication, making it meaningful to collectors, gift buyers, and home decor enthusiasts around the world.
Readers who want to explore authentic handcrafted work can browse the Kashmiri paper mache shop, learn more about Mughal Arts and its artisans, or continue reading related stories in the Mughal Arts Journal.
Where to Learn More
To understand the broader cultural context of the region, readers can explore general information about Kashmir and the history of papier-mâché as a decorative craft.
You can also follow new handmade releases and behind-the-scenes studio updates on Instagram @mughalarts_com and check external customer feedback through your Etsy review page once you insert the correct review URL.
Frequently Asked Questions About the Papier Mache Process
What is the first step in the papier mache process?
The first step is gathering and sorting suitable waste paper and paper-based materials. This ensures the pulp has the right balance of softness, strength, and consistency for shaping and finishing.
Why is soaking paper important in papier mache?
Soaking softens the paper fibers and prepares them to break down into a smooth, workable pulp. Without proper soaking, the material can remain coarse, uneven, and harder to shape.
Why do handmade papier mache products feel special?
Handmade papier mache products reflect patience, technical skill, and traditional knowledge. Each item carries evidence of material preparation, hand shaping, drying, surface refinement, and careful artistic finishing.
Final Thoughts
The first steps in the papier mache process are where skill meets transformation. Paper is gathered, softened, pulped, shaped, dried, and refined until it becomes a proper base for decoration. What begins as discarded material is gradually turned into something artistic, useful, and culturally meaningful.
At Mughal Arts, the beauty of the finished product is inseparable from the craftsmanship behind its beginning. The story of papier mache starts long before the paint is applied, and that beginning is what gives the final piece its character and charm.
Explore Authentic Kashmiri Papier Mache
Discover handcrafted decor, gift pieces, and traditional art made by skilled artisans in Kashmir.
Follow our latest handmade creations on Instagram @mughalarts_com and check our external customer feedback on Etsy reviews.